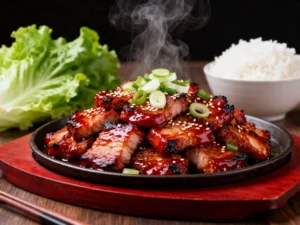
Get tender, sticky, crowd pleasing ribs with weeknight speed, simple pantry ingredients, and barely any babysitting.
You know that moment when you want ribs, but you do not want to babysit a smoker for half a day? This recipe is the cheat code. You get juicy, fall apart meat, a glossy barbecue finish, and the kind of flavor that makes people think you worked way harder than you did. Honestly, this is the dinner version of showing up late and still winning.
The Instant Pot handles the hard part fast, and the oven or broiler brings the sticky, caramelized finish that everyone wants. That means less waiting, less guesswork, and more actual eating. If your usual rib strategy involves takeout menus and hope, this fixes that. Fast.
What Makes This Recipe So Good

This recipe works because it combines pressure cooking with a high heat finish. The pressure cooker tenderizes the ribs quickly, while the final broil or bake sets the sauce into that irresistible lacquered layer. You get the best parts of low and slow cooking without sacrificing your entire day.
The flavor also hits all the right notes. You have savory spices, smoky paprika, a little sweetness, tangy vinegar, and rich barbecue sauce. It tastes balanced instead of flat, which matters because bland ribs are just meat with trust issues.
Another reason people love this method: it is incredibly forgiving. You do not need a grill, a smoker, or advanced rib intuition. If you can remove a membrane, press a button, and brush on sauce, you are in business.
It is also perfect for busy nights, game days, casual parties, or anytime you want a high reward meal with low drama. IMO, that is the sweet spot for a recipe worth keeping.
What Goes Into This Recipe – Ingredients
These ingredients create tender ribs with bold flavor and that classic sticky finish. Most of them are pantry basics, which is always nice because last minute rib cravings do not care what is in your spice cabinet.
- 2 racks pork baby back ribs, about 4 to 5 pounds total
- 1 cup barbecue sauce, plus more for serving if desired
- 1 cup apple juice or water
- 2 tablespoons apple cider vinegar
- 2 tablespoons brown sugar
- 1 tablespoon smoked paprika
- 2 teaspoons garlic powder
- 2 teaspoons onion powder
- 2 teaspoons kosher salt
- 1 teaspoon black pepper
- 1 teaspoon chili powder
- 1 teaspoon dry mustard
- 1 teaspoon liquid smoke, optional but helpful
- 1 tablespoon Worcestershire sauce, optional for deeper flavor
If you like a sweeter profile, add a bit more brown sugar to the rub or use a honey based barbecue sauce. If you want more heat, add cayenne or a spicy sauce. The base recipe stays flexible without falling apart, unlike that one rack you forgot under the broiler.
Let’s Get Cooking – Instructions
This method keeps things simple: season, pressure cook, sauce, and finish under high heat. Here is the step by step game plan.
-
Prep the ribs. Remove the membrane from the back of the ribs if it is still attached. Slide a butter knife under one corner, grab it with a paper towel, and pull. This helps the seasoning penetrate better and gives you a more tender bite.
-
Cut the racks to fit. Slice each rack into 3 or 4 sections so they fit inside your Instant Pot. You want the pieces to stand upright around the inner pot, not lie flat in a meat puddle.
-
Mix the dry rub. In a small bowl, combine brown sugar, smoked paprika, garlic powder, onion powder, salt, black pepper, chili powder, and dry mustard. Rub the mixture all over both sides of the ribs. Be generous. The ribs can handle it.
-
Add the cooking liquid. Pour the apple juice and apple cider vinegar into the Instant Pot insert. If you are using liquid smoke or Worcestershire sauce, add them now. Place the trivet inside so the ribs stay above the liquid.
-
Arrange the ribs. Stand the rib sections upright on the trivet, wrapping them in a loose circle around the pot. Do not pack them too tightly. A little breathing room helps them cook evenly.
-
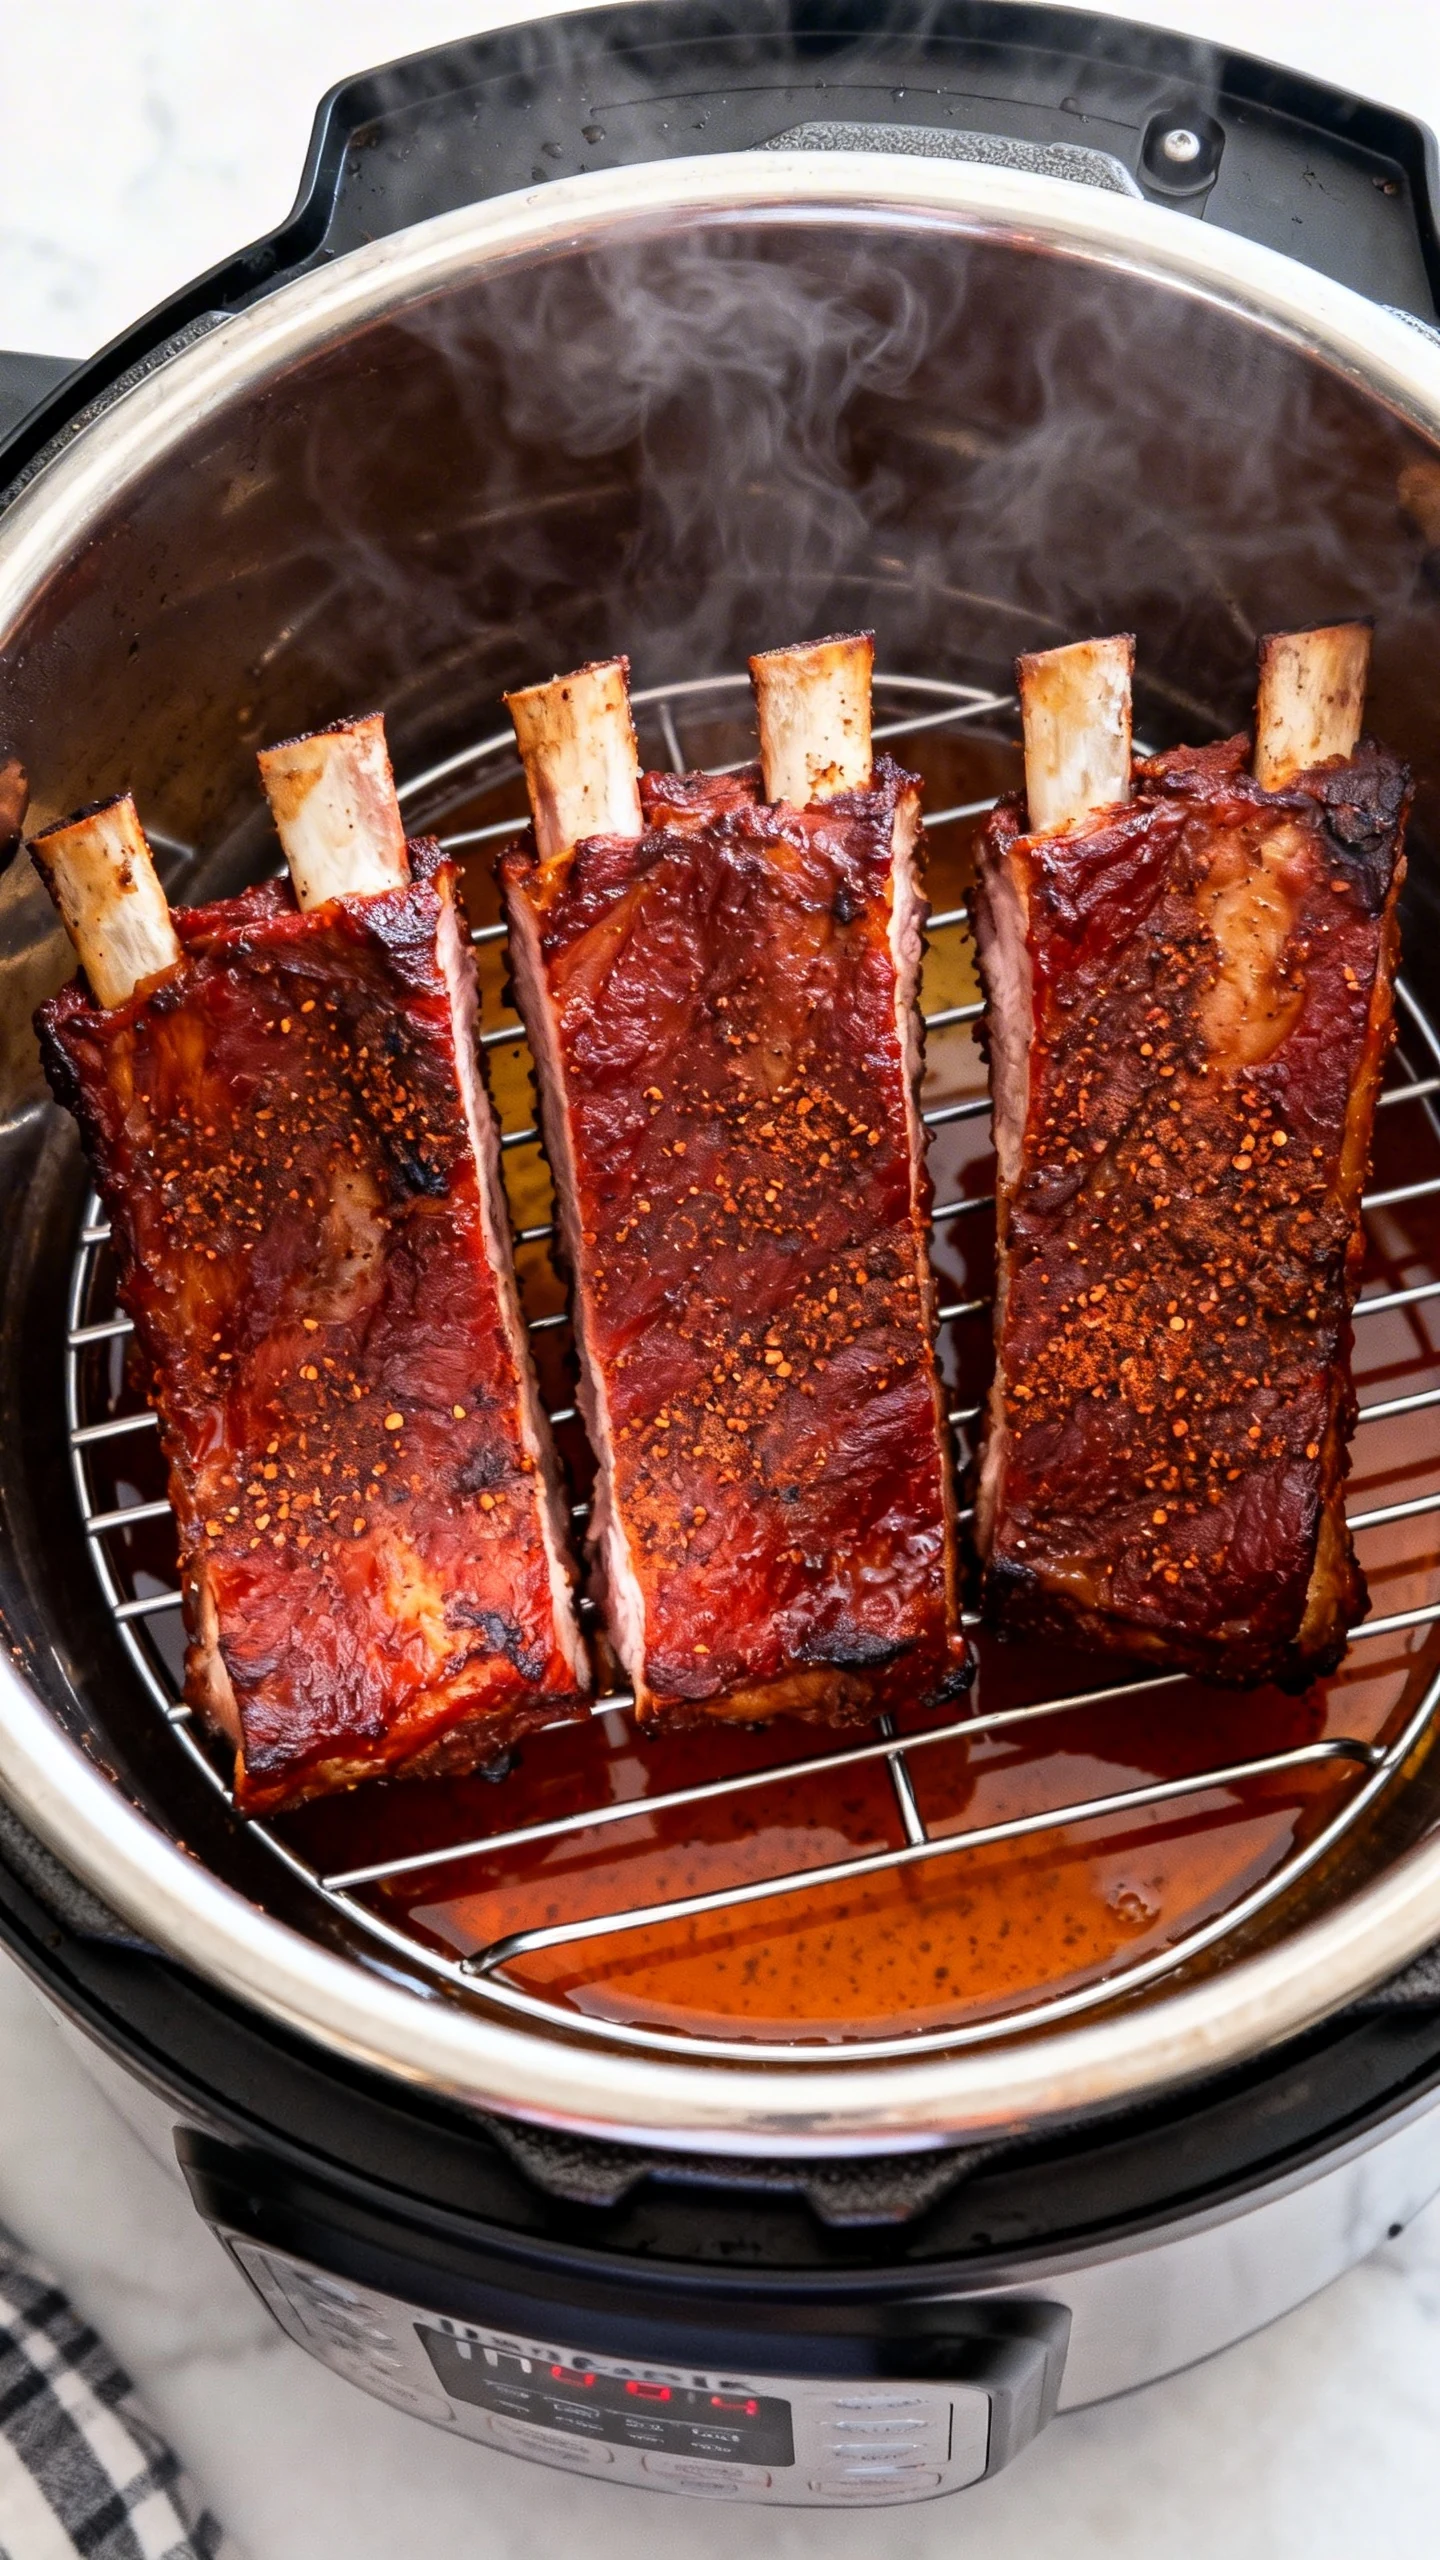
Pressure cook. Lock the lid and set the valve to sealing. Cook on high pressure for 23 to 27 minutes for baby back ribs, depending on thickness. For spare ribs, aim closer to 30 to 35 minutes.
-
Let pressure release naturally. Allow a natural release for 10 minutes, then carefully quick release any remaining pressure. This keeps the ribs juicy and helps prevent them from turning too fragile too soon.
-
Heat the broiler. Preheat your broiler or oven to high heat. Line a baking sheet or broiler pan with foil for easier cleanup, because nobody dreams about scrubbing caramelized sauce off metal.
-
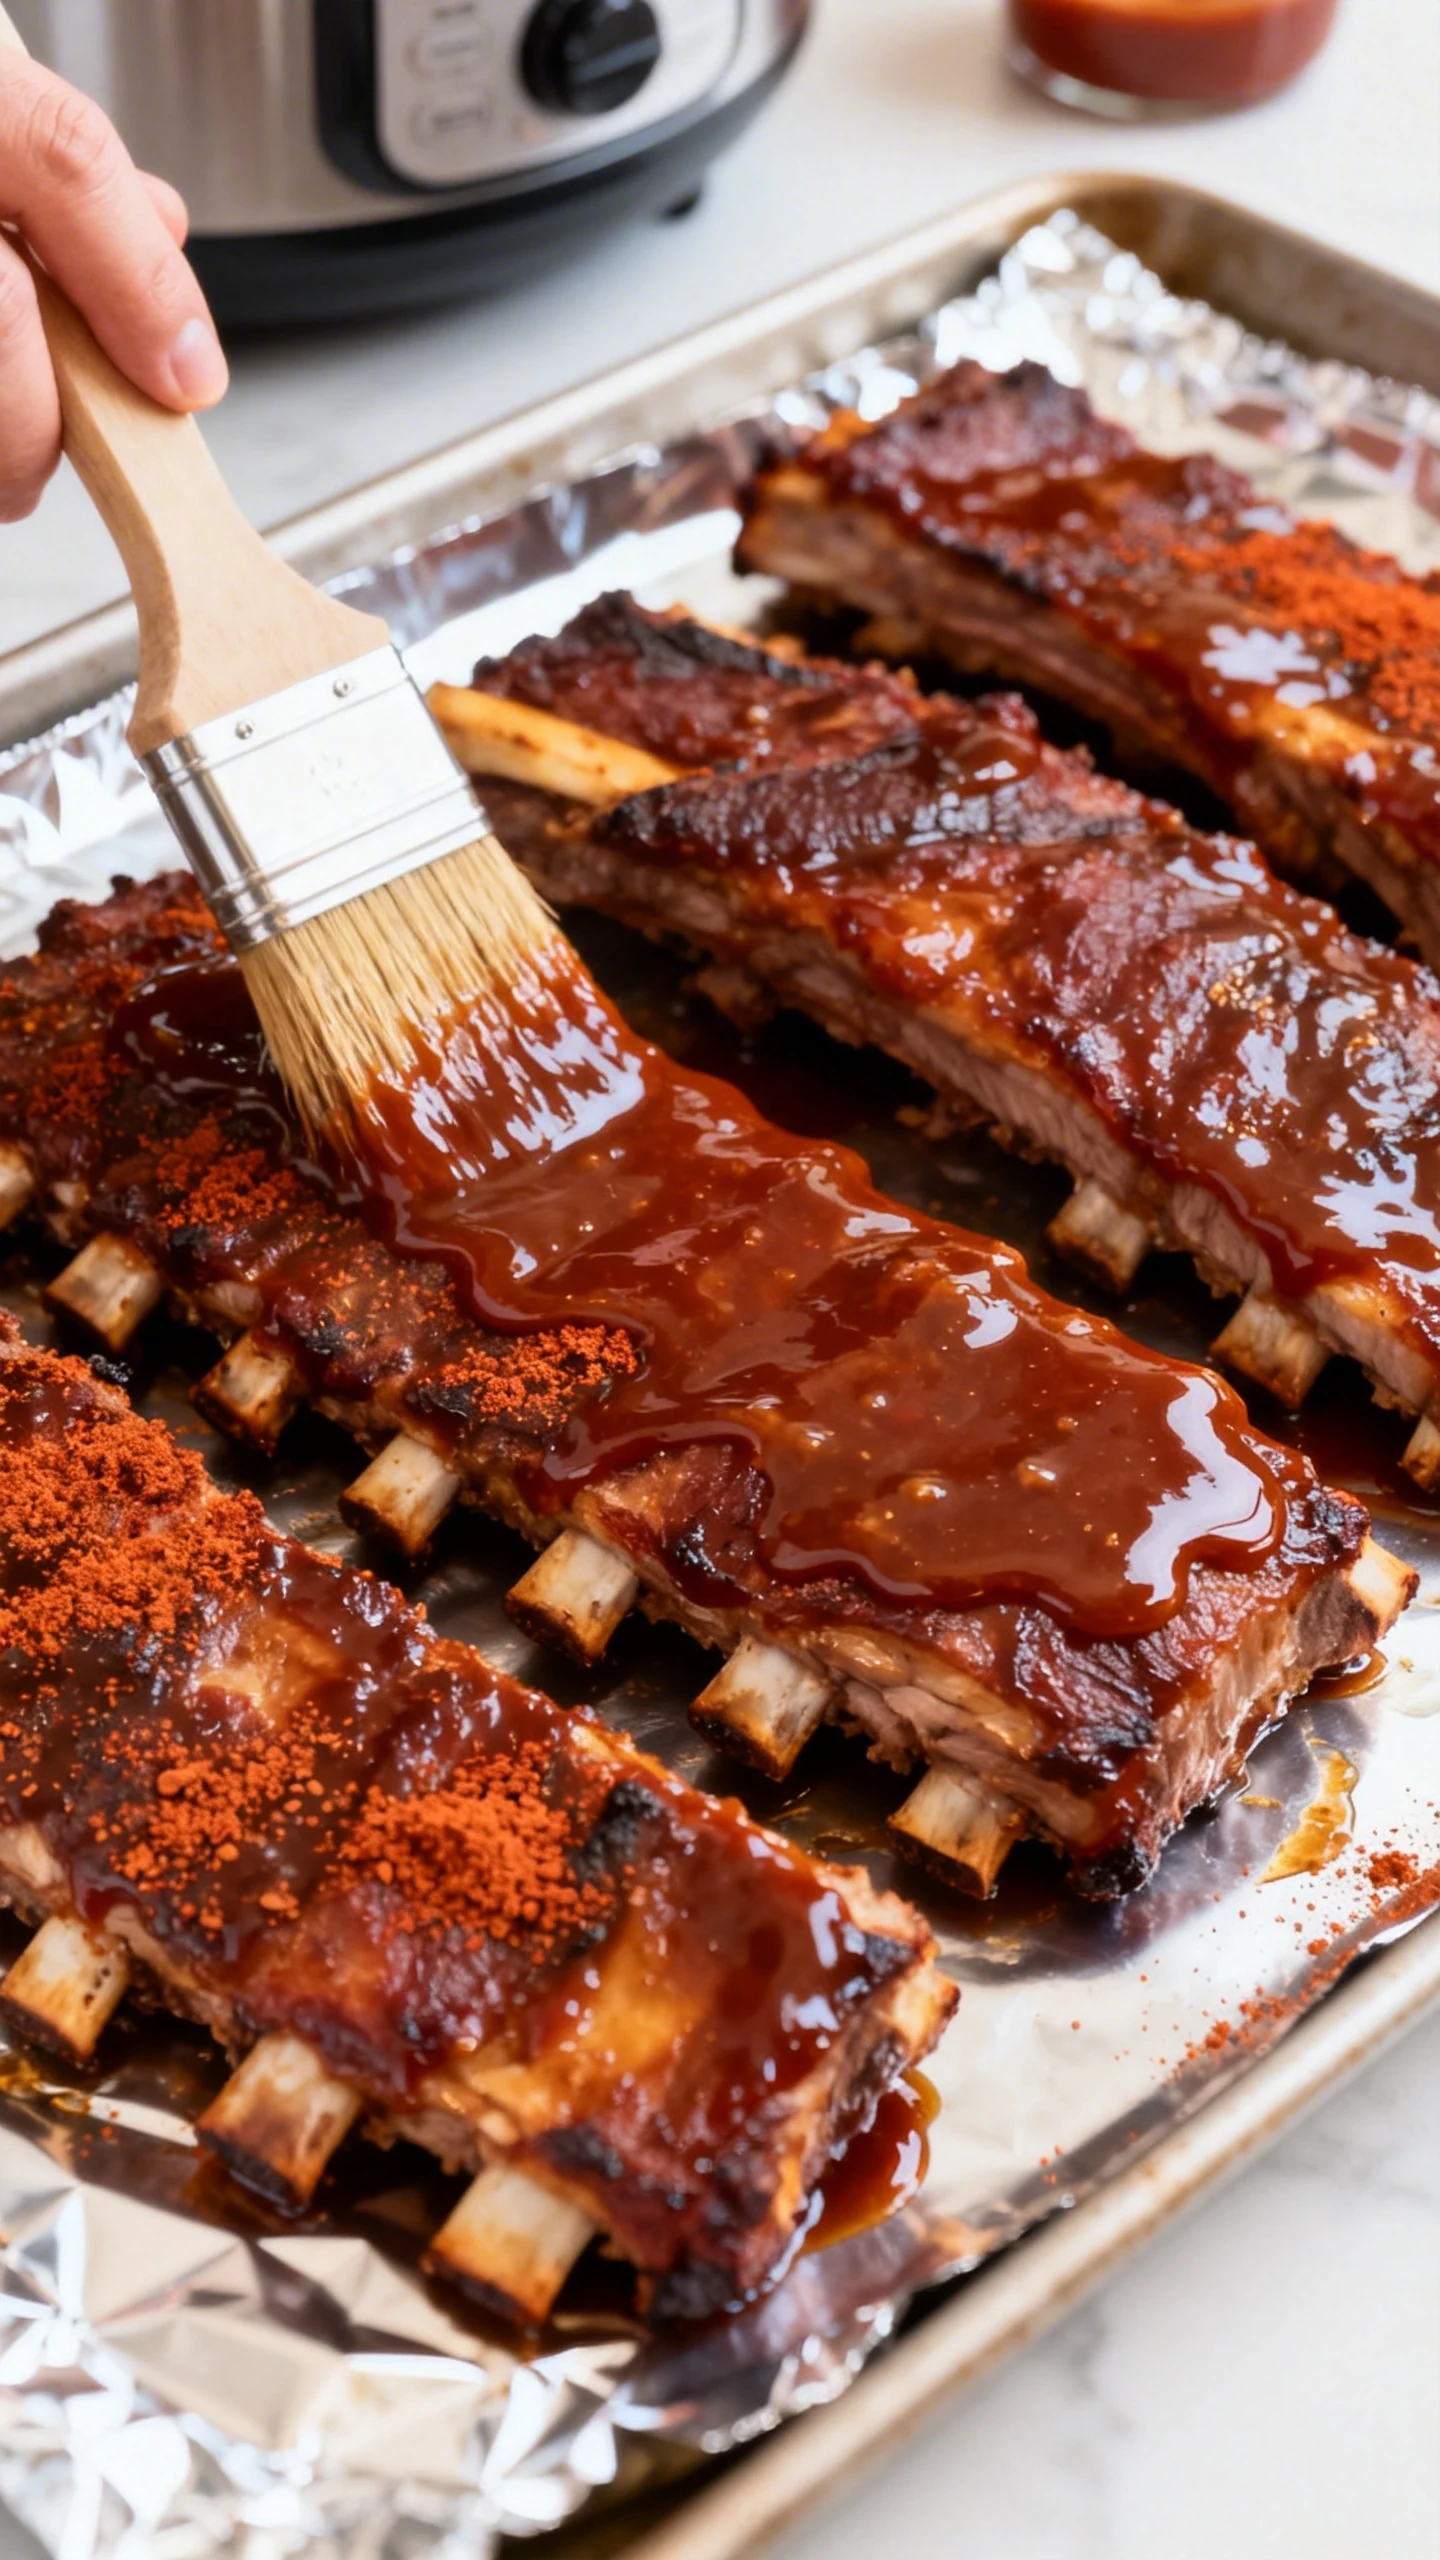
Sauce the ribs. Transfer the cooked ribs carefully to the prepared baking sheet. Brush a generous layer of barbecue sauce over the top side. If you want extra sticky ribs, do not be shy.
-
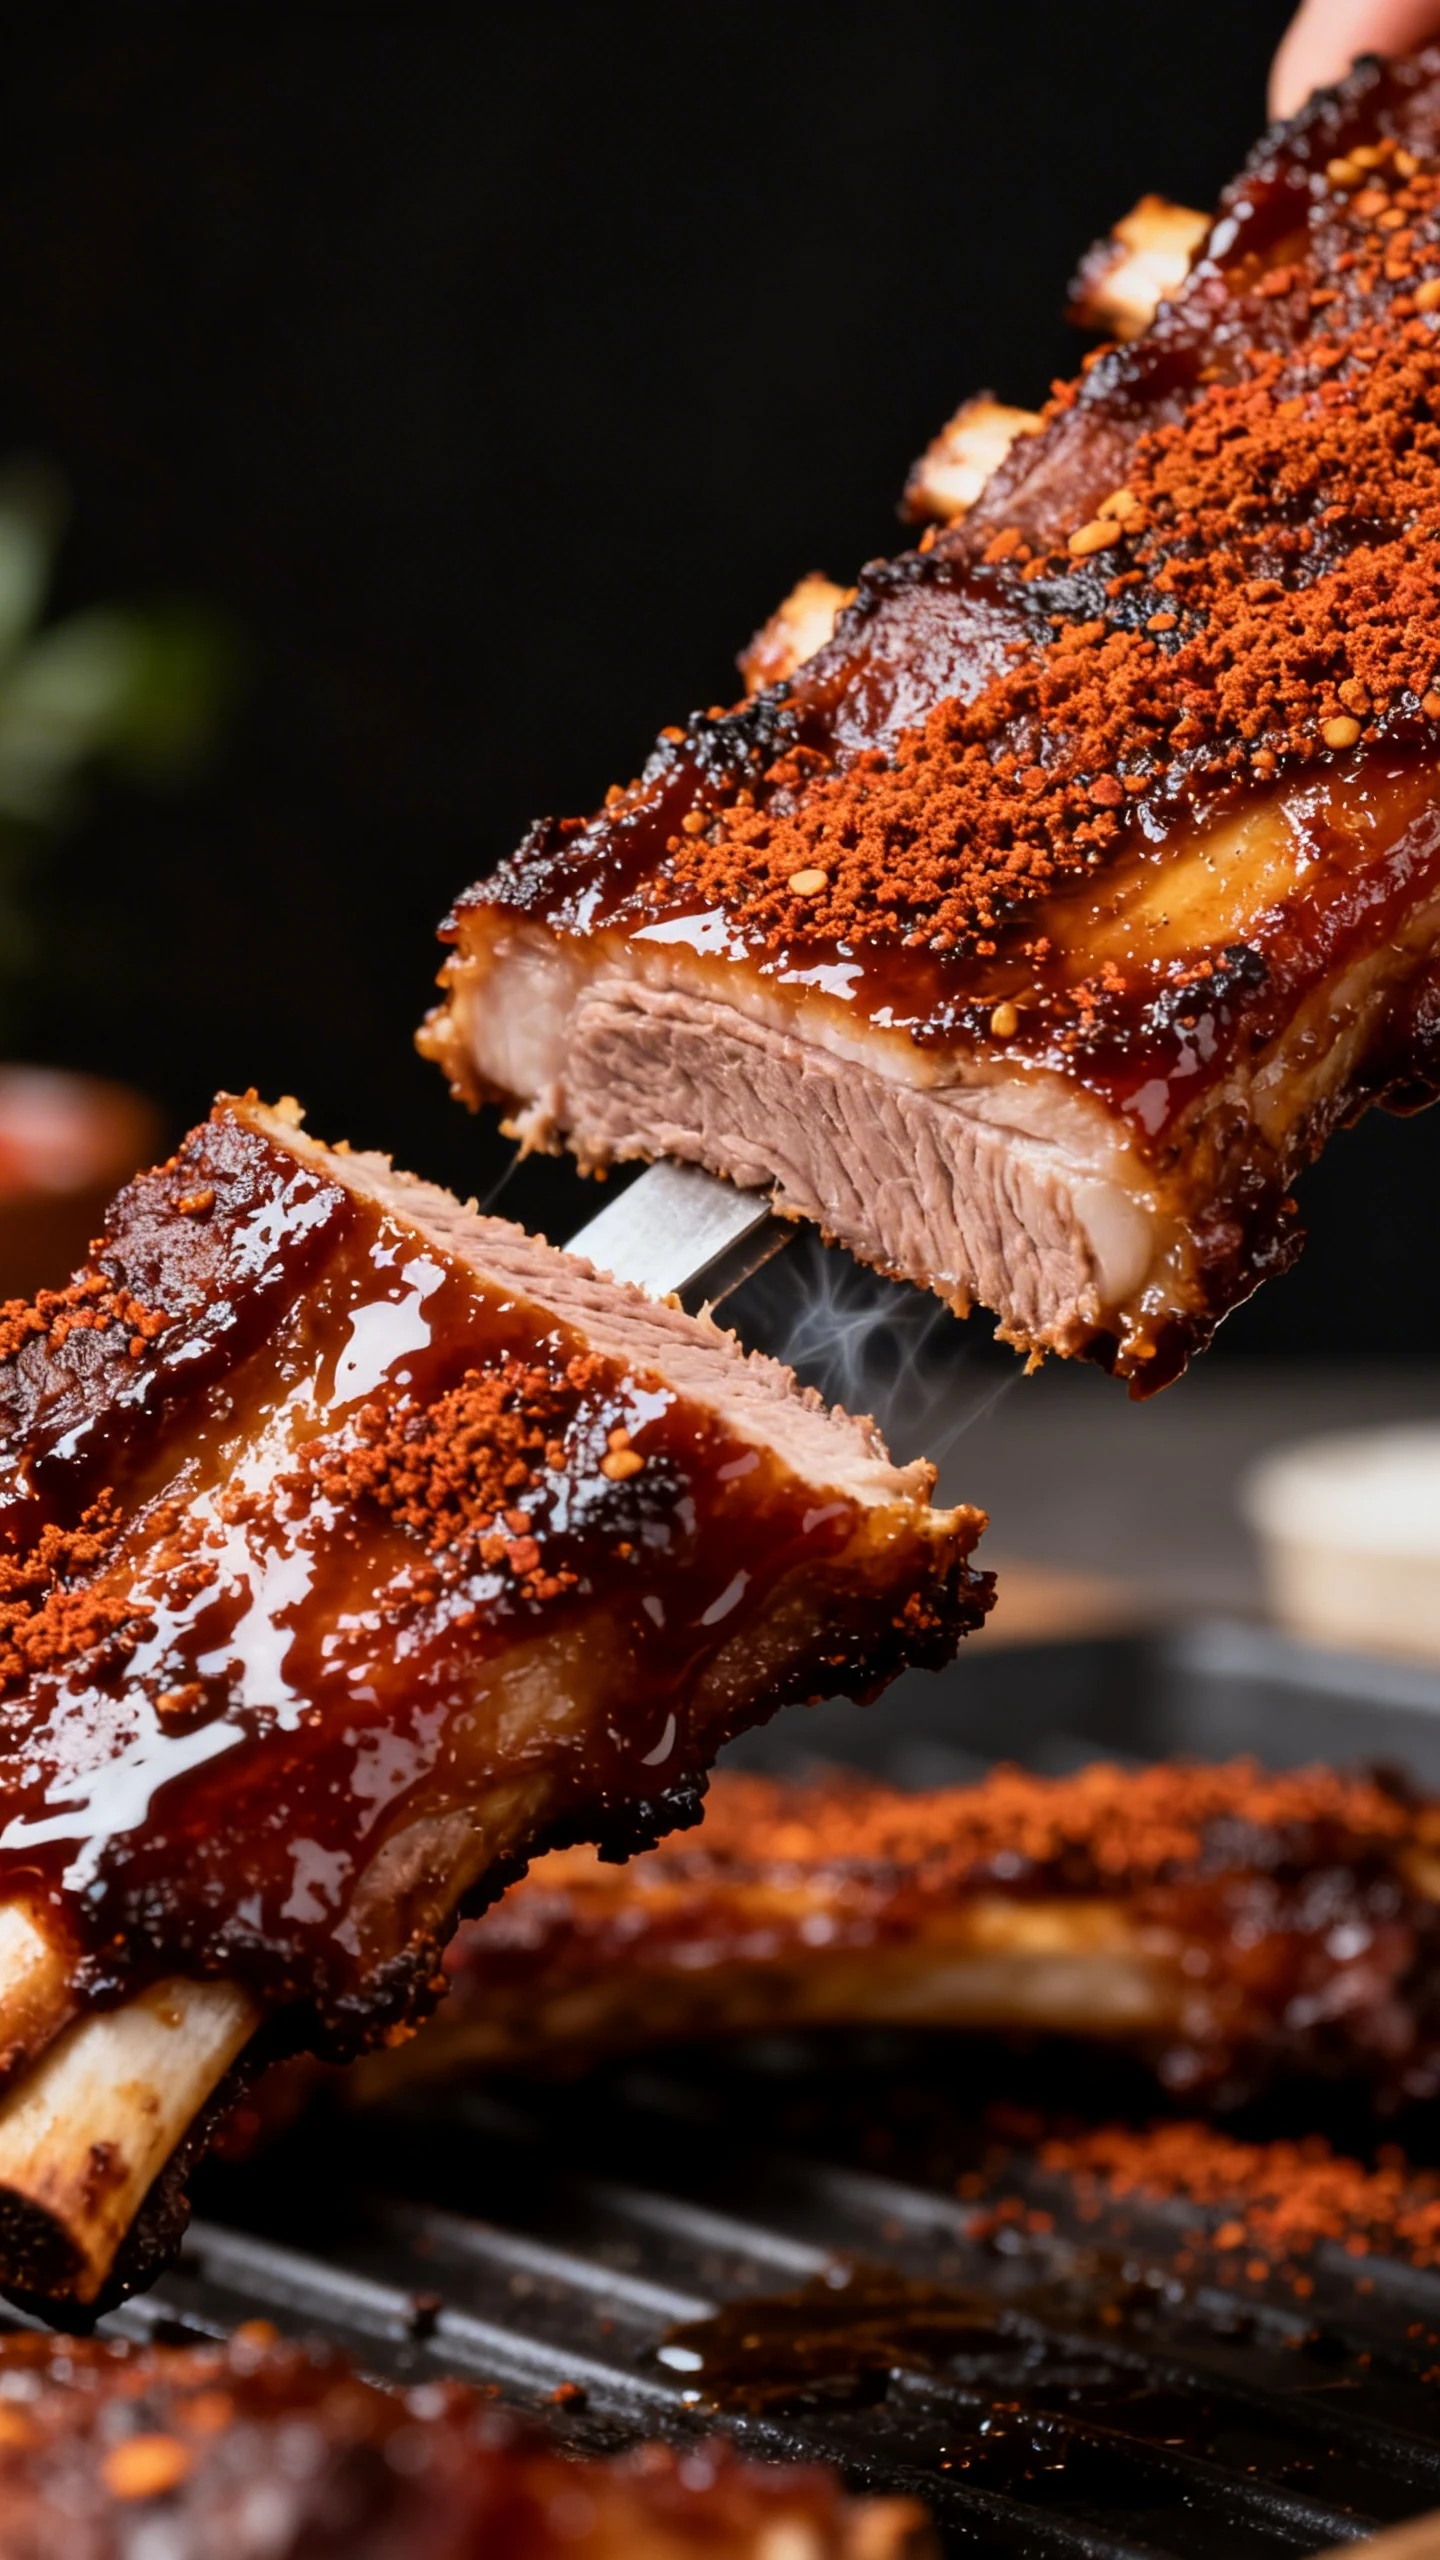
Broil to finish. Broil for 3 to 5 minutes until the sauce bubbles and starts to caramelize. Watch closely. The line between perfect and tragic is very short under a broiler.
-
Optional second coat. Pull the ribs out, brush on another thin layer of sauce, and broil for 1 to 2 more minutes if you want a thicker glaze. FYI, this is the move if you like that restaurant style finish.
-
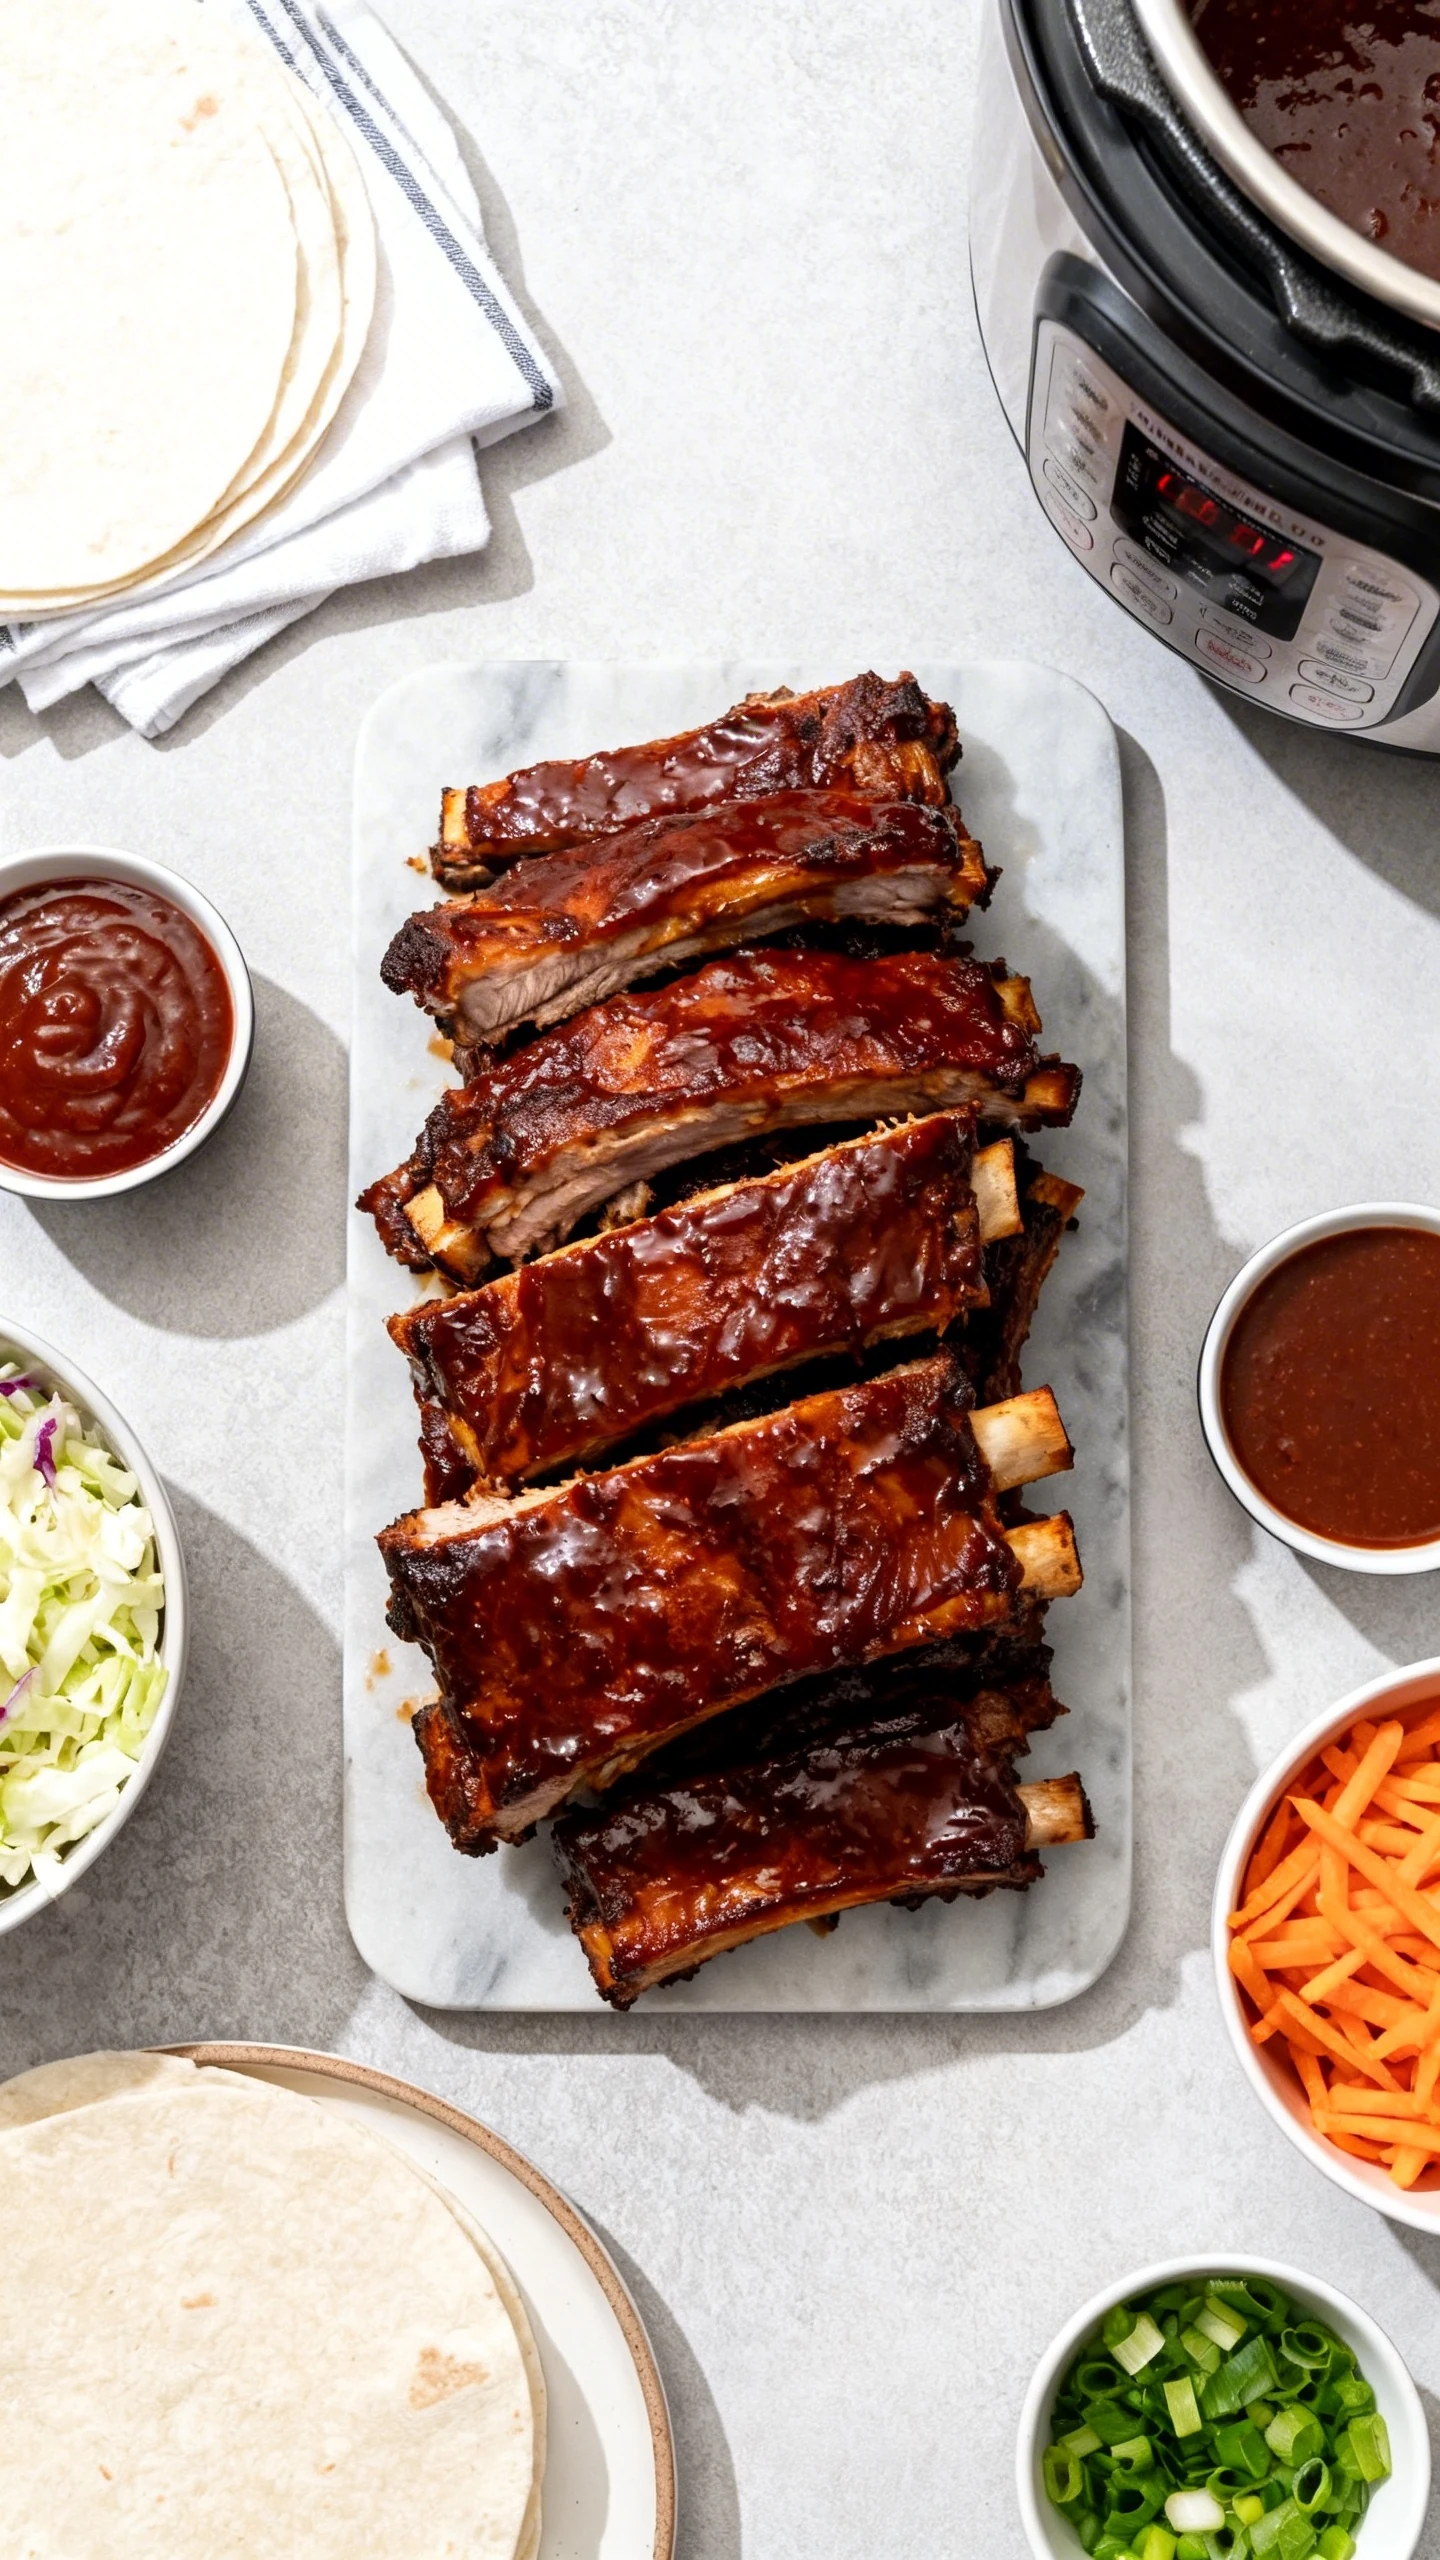
Rest and serve. Let the ribs rest for about 5 minutes before slicing. Serve with extra sauce, plenty of napkins, and your favorite sides.
Storage Instructions

Store leftover ribs in an airtight container in the refrigerator for up to 4 days. If possible, keep extra sauce separate so the texture stays better during reheating. That said, sauced leftovers still disappear fast.
To reheat, place the ribs in a baking dish, add a splash of water or apple juice, cover with foil, and warm at 300 degrees Fahrenheit until heated through. You can also microwave them in short bursts, though the oven gives you better texture. The microwave works in emergencies and questionable life choices.
For longer storage, freeze the cooked ribs for up to 3 months. Wrap them tightly in foil or plastic wrap, then place them in a freezer safe bag or container. Thaw overnight in the fridge before reheating.
Health Benefits
Ribs may not be kale, but they still bring some nutritional value to the table. Pork provides protein, which supports muscle repair, satiety, and overall energy. A hearty serving can leave you full for hours, which means fewer random snack raids later.
Pork also contains important nutrients like B vitamins, zinc, iron, and selenium. These nutrients support metabolism, immune function, and oxygen transport in the body. So yes, your comfort food has a résumé.
You can make this recipe a little lighter by choosing a lower sugar barbecue sauce, trimming excess fat, and serving the ribs with vegetables instead of only heavy sides. Coleslaw, roasted green beans, or a crisp salad all work well. Balance is beautiful, even next to sticky ribs.
Don’t Make These Errors
Skipping the membrane is one of the biggest mistakes. That tough layer on the back of the ribs can block seasoning and create a chewy texture. Remove it for the best bite.
Adding too much liquid can water down flavor and make the ribs soggy. The Instant Pot needs only enough liquid to build pressure, not enough to boil the ribs into sadness. Stick with about 1 cup plus a little acid.
Overcooking the ribs can make them fall apart before they ever reach the broiler. Tender is the goal, not meat confetti. Start with the lower end of the cook time if your racks are small.
Skipping the finishing step leaves you with pale, soft sauce instead of that sticky, caramelized crust. The broiler is not optional if you want classic barbecue vibes. It is the glow up.
Using cold sauce straight from the fridge is not a disaster, but room temperature sauce spreads more evenly and warms faster under the broiler. Small detail, better result. Those little tweaks add up.
Mix It Up
This recipe is easy to customize based on your mood, pantry, or sauce loyalty. You can change the rub, switch the sauce, or adjust the heat level without breaking the method.
- Spicy version: Add cayenne, chipotle powder, or hot sauce to the rub or sauce.
- Honey glaze: Mix barbecue sauce with honey for a shinier, sweeter finish.
- Bourbon style: Stir a splash of bourbon into the sauce before brushing it on.
- Dry rub finish: Skip some of the sauce and broil with a little extra rub for a less sticky result.
- Spare ribs: Use spare ribs instead of baby backs, but increase pressure cook time slightly.
- Oven finish: If you do not want to broil, bake at 425 degrees Fahrenheit until the sauce sets and darkens.
You can also play with regional flavor profiles. Try a Kansas City style sweet sauce, a Carolina inspired tangy version, or a smoky Texas leaning rub. No rib police are coming.
FAQ
Can I use frozen ribs?
Yes, but thawed ribs work better for even seasoning and texture. If you cook from frozen, add a few extra minutes to the pressure cook time and expect a little more moisture. You may also need to separate the rack pieces after partial thawing if they went into the freezer as one solid block.
How do I know when the ribs are done?
The ribs should look tender and bend easily when lifted with tongs. The meat should pull back slightly from the bones, and a knife should slide in with little resistance. After the broiler finish, they should also have a glossy, caramelized surface.
Can I make these ahead of time?
Absolutely. Pressure cook the ribs, cool them, and store them in the fridge for up to a day before finishing with sauce and broiling. This is great for parties because you handle the messy part early and finish them fast right before serving.
What is the best barbecue sauce to use?
Use one you already love. A thicker sauce usually clings better during broiling, while a thinner sauce creates a lighter glaze. Sweet, smoky, spicy, or tangy all work here, so choose based on your taste.
Do I need liquid smoke?
No, but it helps if you want a more smoked flavor without using a grill or smoker. Just use a small amount, because it can become overpowering quickly. Think hint, not perfume.
Can I finish the ribs on a grill instead?
Yes. After pressure cooking, brush the ribs with sauce and grill them over medium heat for a few minutes per side until the sauce sets. This adds even more char and smoky flavor, which is never a bad idea.
Why are my ribs tough?
Tough ribs usually need more cooking time or better membrane removal. If the ribs are thick, older, or especially meaty, add a few extra minutes next time. Also make sure you let them rest briefly after finishing so the juices settle.
Wrapping Up
If you want ribs that taste like a weekend project without actually becoming one, this recipe delivers. The Instant Pot speeds up the tenderizing, the broiler handles the sticky finish, and you get big barbecue flavor with very little hassle. That is a pretty solid trade.
Whether you serve these for game day, family dinner, or a random Tuesday when only ribs will do, they hit hard every time. Keep your favorite sauce nearby, make a few sides, and enjoy the kind of meal that shuts down conversation for a minute. The best dinners usually do.