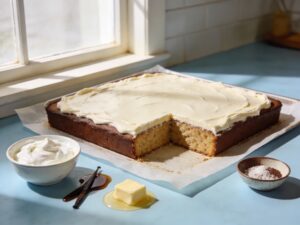
Moist, cocoa-kissed layers with tangy cream cheese frosting, made with simple pantry staples and zero boxed shortcuts.
You know that red velvet cake that makes people go quiet after the first bite? The one that somehow tastes like “fancy” without tasting like food coloring? That cake isn’t magic. It’s just the right balance of cocoa, buttermilk tang, and a tender crumb that stays soft for days.
Most homemade versions fail for one reason: they chase “red” and forget “velvet.” We’re not doing that. We’re building flavor first, then texture, then the dramatic color payoff.
If you can stir batter and set a timer, you can make this. And when someone asks where you bought it, you’ll get to decide whether you tell the truth or enjoy the moment.
What Makes This Special
This recipe hits the three things red velvet should always nail: moist crumb, mild cocoa flavor, and tangy frosting. It uses oil for tenderness and a touch of butter for flavor, so you get the best of both worlds without a dry slice on day two.
We also use buttermilk and a vinegar-baking soda reaction for lift and that classic subtle tang. The cocoa stays restrained on purpose, because red velvet is not chocolate cake wearing a red suit. It’s its own thing, and it’s smug about it.
Finally, the mixing method avoids overworking the batter, which keeps the crumb soft and “velvety.” IMO, this is the difference between “nice cake” and “why is this gone already?”
What You’ll Need (Ingredients)
These amounts make one two-layer 9-inch cake with cream cheese frosting.
- All-purpose flour: 2 1/2 cups (about 325 g)
- Unsweetened natural cocoa powder: 2 tablespoons
- Baking soda: 1 teaspoon
- Fine salt: 1/2 teaspoon
- Granulated sugar: 1 1/2 cups (about 300 g)
- Neutral oil (canola or vegetable): 1 cup
- Unsalted butter (melted and cooled slightly): 2 tablespoons
- Large eggs: 2, room temperature
- Vanilla extract: 2 teaspoons
- Buttermilk: 1 cup, room temperature
- White vinegar: 1 teaspoon
- Red gel food coloring: 1 to 2 teaspoons (or liquid coloring, 1 to 2 tablespoons)
For the frosting and assembly:
- Cream cheese (full-fat, block style): 16 oz (about 450 g), softened
- Unsalted butter: 1/2 cup (113 g), softened
- Powdered sugar: 4 to 5 cups (about 480 to 600 g), sifted if lumpy
- Vanilla extract: 2 teaspoons
- Fine salt: a pinch
- Optional: 1 to 2 tablespoons heavy cream or milk (to adjust consistency)
Let’s Get Cooking – Instructions
-
Get set up like a pro. Heat the oven to 350°F (175°C). Grease two 9-inch round pans, line the bottoms with parchment, then grease the parchment too. This takes one minute and saves you from rage later.
-
Mix the dry ingredients. Whisk flour, cocoa powder, baking soda, and salt in a bowl. Break up cocoa lumps now, not in the batter when it’s too late.
-
Build the base. In a large bowl, whisk sugar, oil, and melted butter until glossy. Add eggs and whisk until smooth, then whisk in vanilla.
-
Add color the smart way. Stir the red food coloring into the buttermilk so it disperses evenly. You want a rich red batter, not random streaks that look like you lost a paintball fight.
-
Alternate wet and dry. Add the dry ingredients in three additions, alternating with the colored buttermilk in two additions. Mix gently with a whisk or spatula just until combined. Stop the moment you stop seeing flour.
-
Activate the lift. Stir vinegar into the batter quickly and evenly. It will fizz a bit and that’s the point. Work fast, but don’t whip it into submission.
-
Pan and bake. Divide batter evenly between pans. Bake 25 to 32 minutes, or until a toothpick comes out with a few moist crumbs and the tops spring back when lightly pressed.
-
Cool correctly. Let cakes cool in pans 10 minutes, then turn out onto a rack and cool completely. Warm cake plus cream cheese frosting equals a slippery, dramatic mess.
-
Make the frosting. Beat cream cheese and butter together until smooth and creamy. Add vanilla and a pinch of salt. Beat in powdered sugar gradually until thick, fluffy, and spreadable. If it feels too stiff, add a tablespoon of cream. If it feels too soft, add more powdered sugar and chill 10 minutes.
-
Level and layer. If the cakes domed, trim them slightly with a serrated knife. Place the first layer on a plate, add a thick layer of frosting, then top with the second layer.
-
Crumb coat for clean edges. Spread a thin coat of frosting all over the cake to trap crumbs, then chill 15 to 20 minutes. Finish with a final coat and swirl it like you meant to.
-
Optional flex. Save trimmed cake bits to sprinkle on top. It looks bakery-level and also covers any “oops” spots. FYI, this is legal.
How to Store
Because of the cream cheese frosting, store the cake covered in the refrigerator. It keeps well for up to 5 days, and the flavor actually gets better after the first night.
For the best texture, let slices sit at room temperature for 20 to 30 minutes before serving. Cold cake tastes tighter and less “velvet,” and we didn’t do all this work for tight.
To freeze, wrap unfrosted layers tightly in plastic wrap and then foil, and freeze up to 2 months. Thaw overnight in the fridge, then frost. You can also freeze frosted slices, but wrap them well and accept that the frosting texture may soften slightly.
Benefits of This Recipe
- True red velvet flavor: mild cocoa with tang, not a chocolate cake pretending.
- Moist for days: oil keeps the crumb tender even after refrigeration.
- Reliable rise: baking soda plus vinegar gives consistent lift without dryness.
- Frosting that slaps: tangy, creamy, and not cloyingly sweet unless you choose it.
- Celebration-ready: looks dramatic, slices clean, and gets compliments on autopilot.
Don’t Make These Errors
- Overmixing after adding flour. That’s how you get tough cake. Mix just until combined and stop.
- Using the wrong cocoa. Use natural unsweetened cocoa for classic red velvet color and flavor. Dutch-process can darken the crumb and shift the chemistry.
- Frosting warm layers. The frosting will melt, slide, and ruin your confidence for no reason.
- Using spreadable tub cream cheese. It makes frosting loose. Use full-fat block cream cheese.
- Adding too much food coloring. More dye won’t fix bland cake. Flavor first, color second.
Variations You Can Try
Once you nail the base, you can customize without wrecking the texture.
- Three-layer party cake: Bake in three 8-inch pans and start checking at 20 minutes.
- Red velvet cupcakes: Fill liners 2/3 full and bake 18 to 22 minutes at 350°F (175°C).
- Chocolate-leaning velvet: Increase cocoa to 3 tablespoons for a slightly deeper cocoa note.
- Less sweet frosting: Use 4 cups powdered sugar and add an extra pinch of salt for balance.
- Mascarpone twist: Replace 4 oz of cream cheese with mascarpone for extra silkiness.
FAQ
Is red velvet just chocolate cake with food coloring?
No. Red velvet has a lighter cocoa flavor plus a tang from buttermilk and vinegar, and it’s designed to be soft and delicate. Chocolate cake goes harder on cocoa and often tastes richer and darker.
Do I have to use food coloring?
You can skip it and still get the flavor and texture, but the cake will look more like a light cocoa buttermilk cake. If you want color with less dye, use a concentrated gel coloring so you need less overall.
What can I use instead of buttermilk?
If you don’t have buttermilk, mix 1 cup milk with 1 tablespoon lemon juice or vinegar and let it sit 5 to 10 minutes. It won’t be identical, but it works well in a pinch.
Why did my cake turn out dry?
Dry cake usually comes from overbaking or measuring too much flour. Use the spoon-and-level method for flour, and pull the cakes when a toothpick shows moist crumbs, not when it’s bone-dry.
How do I keep cream cheese frosting from getting runny?
Use block cream cheese, keep it cool, and don’t overbeat once it’s smooth. If it softens, chill it 10 to 15 minutes, then re-whip briefly. A pinch more powdered sugar also helps structure.
Can I make this ahead for an event?
Yes. Bake layers a day ahead, wrap tightly, and refrigerate. Frost the next day, then refrigerate the finished cake and let it sit out 20 to 30 minutes before serving for the best bite.
The Bottom Line
This is the red velvet cake that actually earns the name: tender, tangy, lightly cocoa-kissed, and topped with a frosting that tastes like you knew what you were doing. It’s straightforward, consistent, and unapologetically crowd-pleasing.
Make it once and you’ll stop hunting for “the” recipe. Or you’ll keep hunting, but only because you enjoy chaos. Either way, this one will be your benchmark.