Make a fluffy vanilla cake with pantry staples, one bowl, and simple steps that deliver party-worthy slices without stress or fancy tools.
You want a cake that tastes like you tried, even if you didn’t. You want soft crumb, big flavor, and zero weird baking drama. You also want it fast, because life doesn’t pause so you can cream butter for seven minutes like it’s your job. Good news: this cake hits that sweet spot where effort stays low and compliments stay high.
This is the kind of recipe you memorize without meaning to. It’s forgiving, flexible, and it works whether you’re baking for a birthday, a “just because” Wednesday, or a sudden craving that feels personal. And yes, it’s one bowl, because washing extra dishes is not a hobby.
Why You’ll Love This Recipe
This cake delivers tender, moist slices with a clean vanilla flavor that plays nicely with any frosting. You don’t need a mixer, a stand, or a culinary degree. You just need a bowl, a whisk, and the ability to not “freestyle” the baking powder.
It also scales well, which means you can make it as a layer cake, sheet cake, or cupcakes without rewriting your whole life. The texture stays fluffy, not dry, not gummy, not “why is this squeaking?” If you’ve been burned by complicated recipes, this one feels like revenge.
What You’ll Need (Ingredients)

These are simple pantry basics, and each one has a job. Measure carefully and you’ll get a bakery-style crumb without the bakery price tag.
- All-purpose flour (2 1/2 cups)
- Granulated sugar (1 1/2 cups)
- Baking powder (2 1/2 teaspoons)
- Baking soda (1/2 teaspoon)
- Fine salt (1 teaspoon)
- Eggs (3 large, room temperature if possible)
- Milk (1 cup, whole or 2% works best)
- Neutral oil (1/2 cup, like canola or vegetable)
- Unsalted butter (1/4 cup, melted and slightly cooled)
- Vanilla extract (2 teaspoons)
- Sour cream or plain Greek yogurt (1/2 cup)
- Hot water or hot coffee (1/2 cup, for extra softness)
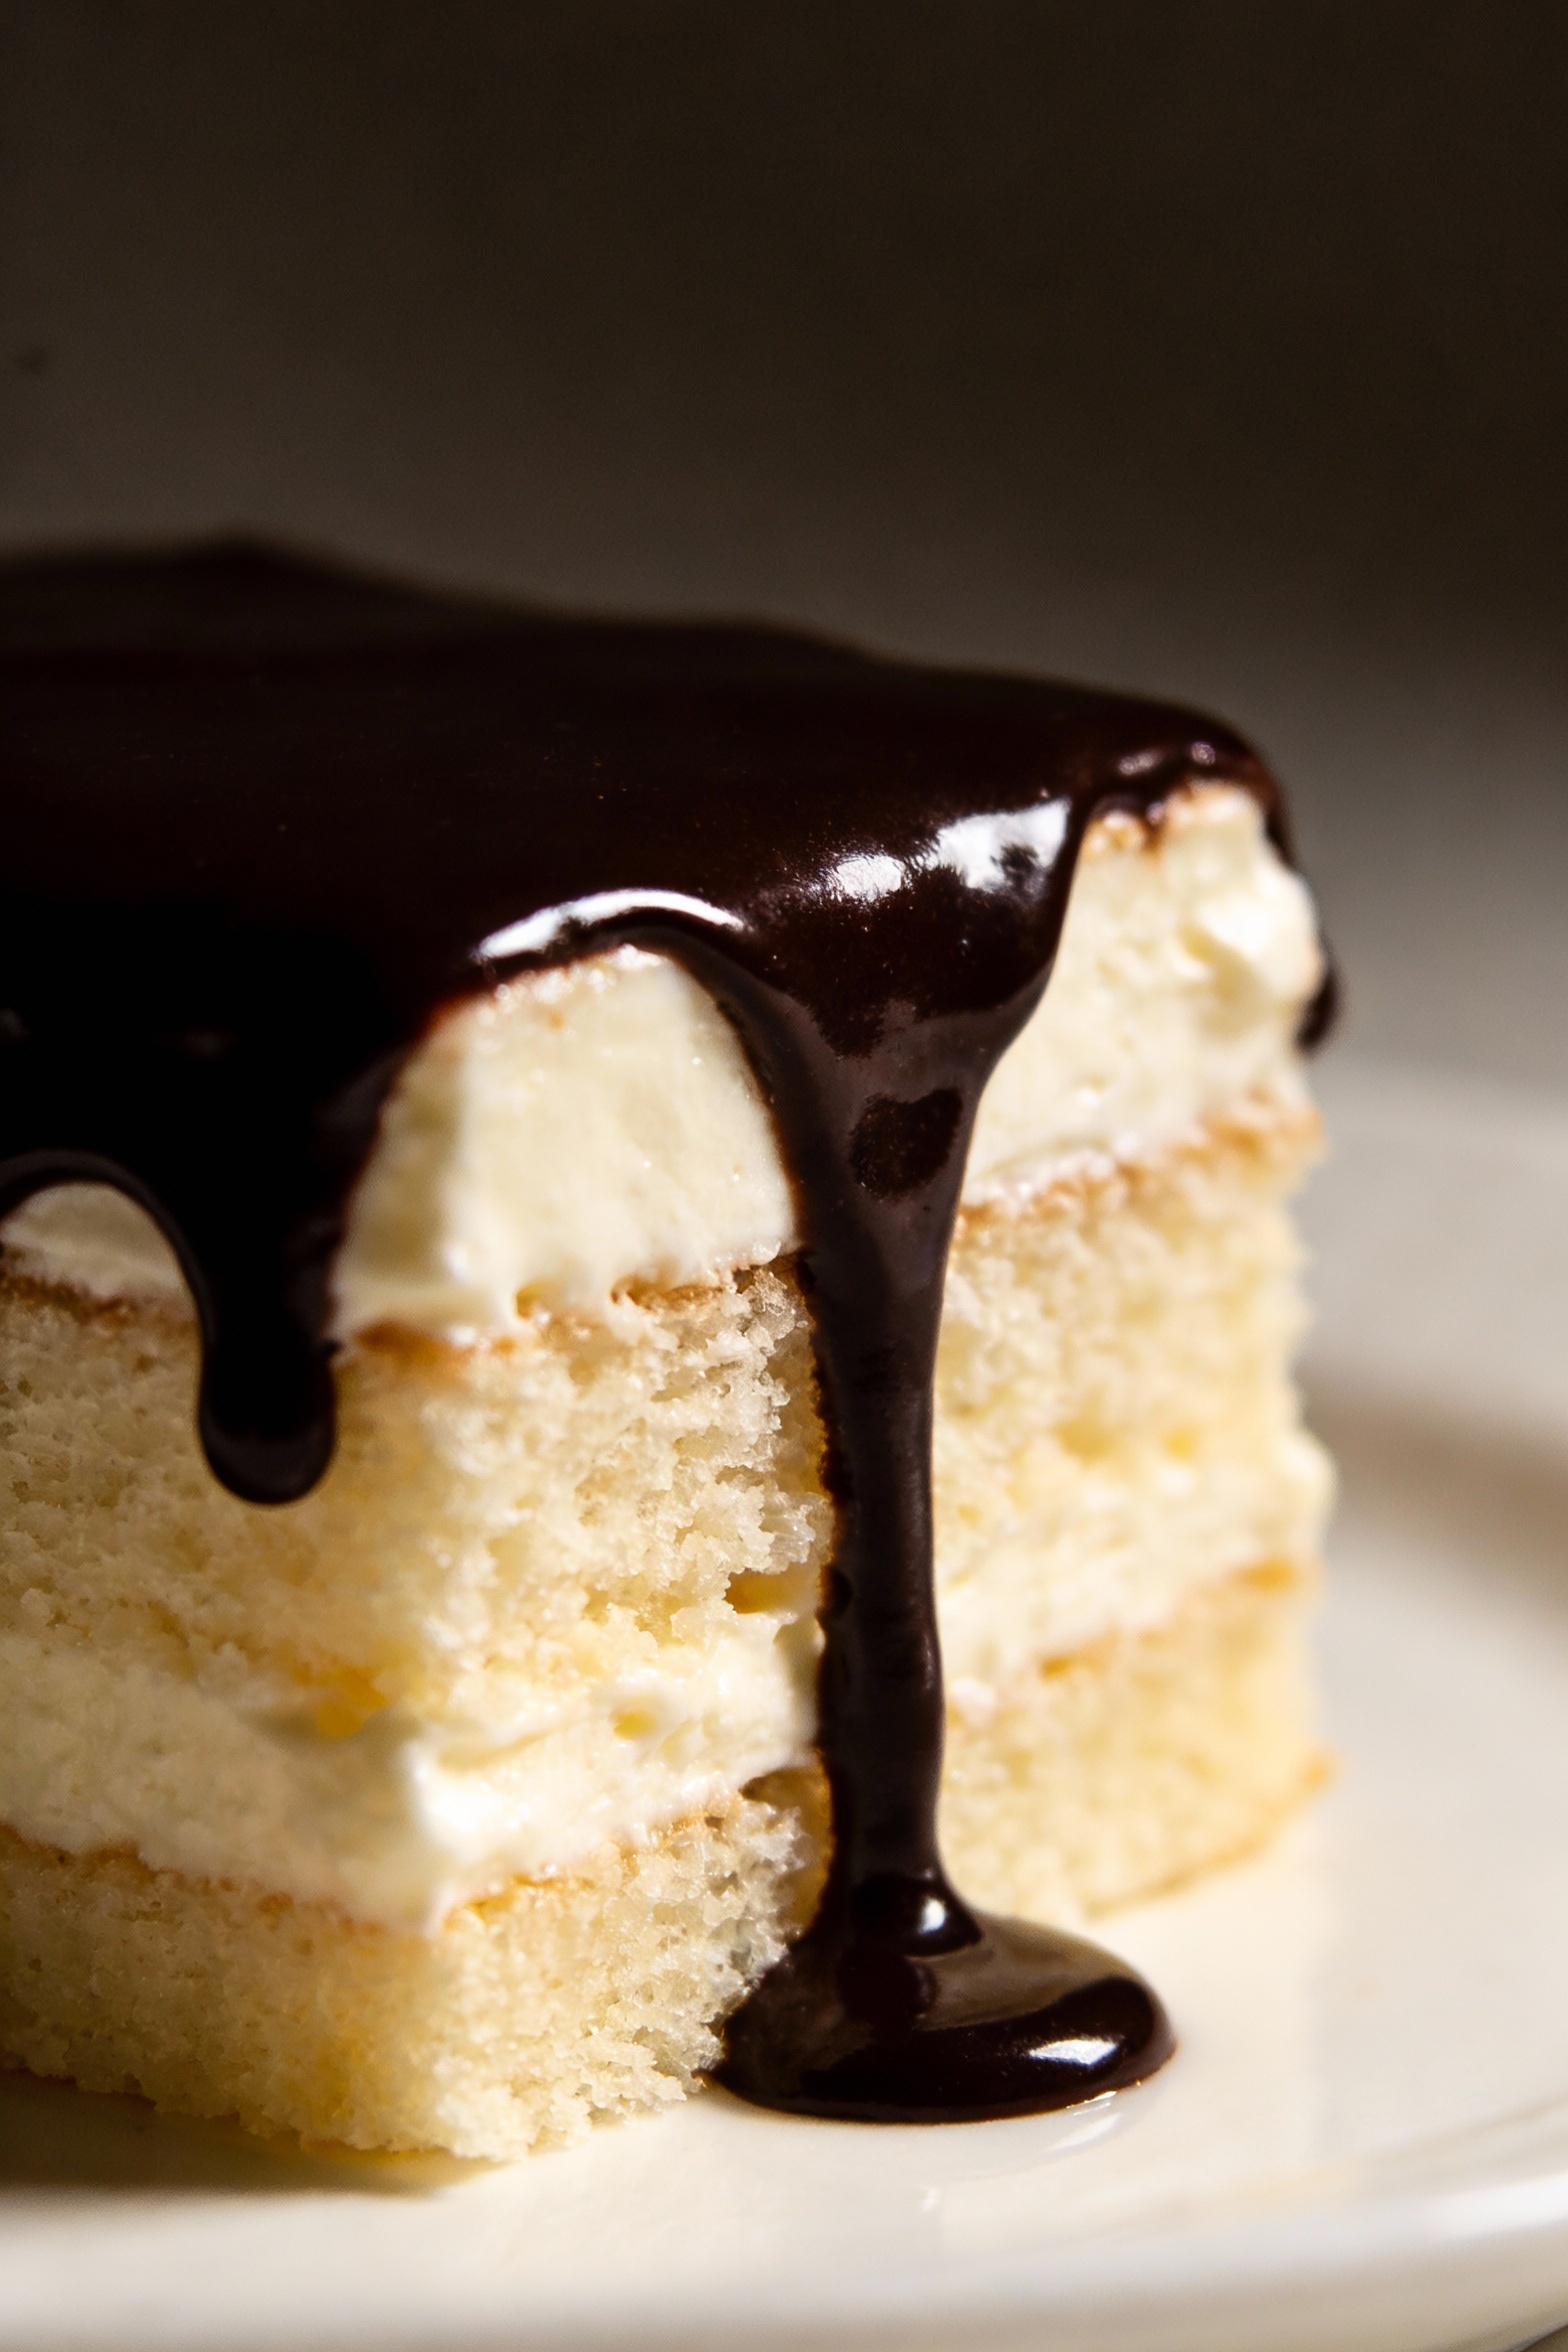
- Optional frosting (buttercream, cream cheese frosting, or chocolate ganache)
Instructions
Follow these steps in order and you’ll get a cake that rises evenly, slices cleanly, and doesn’t crumble like it’s auditioning for a mess. Keep it calm and don’t overmix.
-
Heat and prep. Preheat the oven to 350°F. Grease and line two 8-inch pans or one 9×13 pan. If you skip the parchment, don’t act shocked when the cake clings for dear life.
-
Whisk the dry ingredients. In a large bowl, whisk flour, sugar, baking powder, baking soda, and salt until evenly combined. This prevents random bitter bites of leavener later.
-
Add the wet ingredients. Add eggs, milk, oil, melted butter, vanilla, and sour cream. Whisk until smooth and thick, but stop once the flour disappears. Overmixing turns “fluffy” into “rubbery,” and nobody asked for that.
-
Bloom the batter. Pour in hot water or hot coffee and whisk just until the batter loosens and looks glossy. It will seem thin, and that’s normal. Thin batter bakes into a tender crumb when the ratios are right.
-
Fill the pans evenly. Divide batter between pans or pour into the sheet pan. Tap the pan lightly on the counter to pop big air bubbles. Big bubbles bake into craters, which is cute on the moon, not in cake.
-
Bake. Bake 8-inch layers for 25 to 32 minutes, or a 9×13 for 32 to 38 minutes. A toothpick should come out with a few moist crumbs, not wet batter. If it’s perfectly clean, you may have gone a minute too far.
-
Cool like you mean it. Cool in the pan for 10 minutes, then turn out onto a rack to cool completely. Frosting warm cake creates a melted swamp situation, and that’s not the vibe.
-
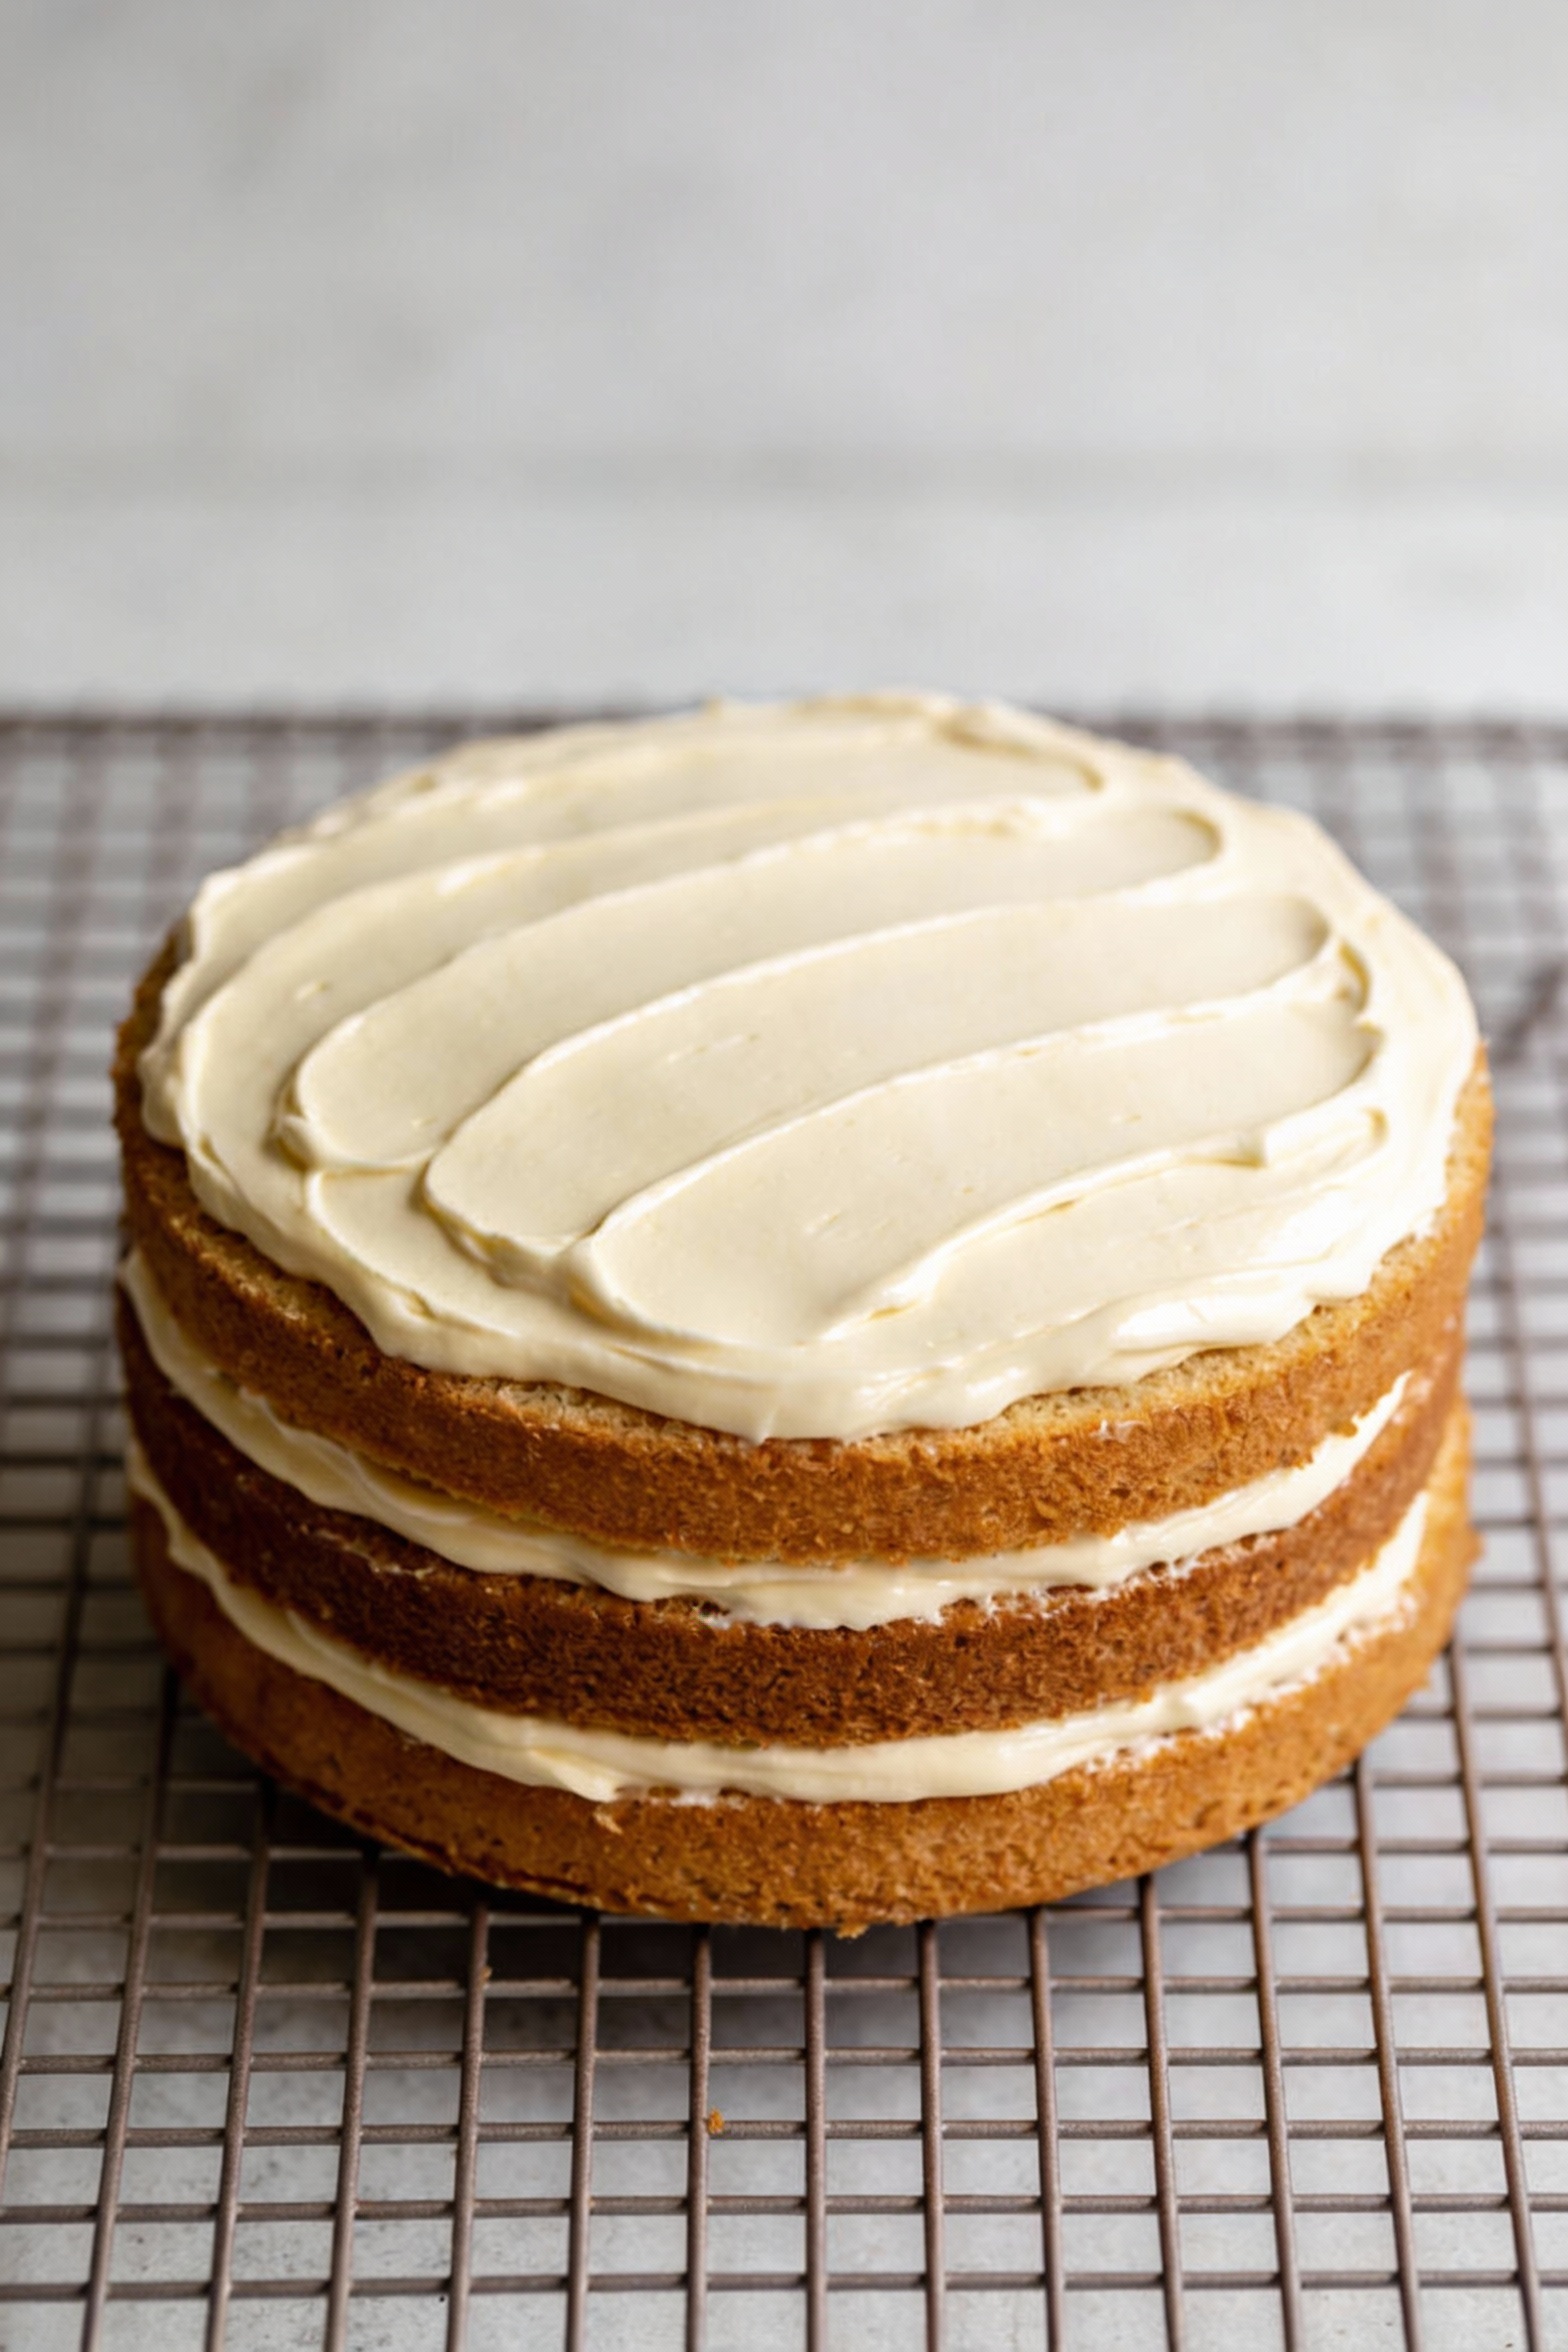
Frost and finish. Level layers if needed, frost, and decorate. Keep it simple or go full celebration. Either way, you just made cake that tastes like confidence.
Storage Instructions
Store unfrosted cake layers wrapped tightly at room temperature for up to 2 days. If your kitchen runs warm, move them to the fridge after day one to keep the crumb fresh. Wrap well, because cake dries out faster than people admit.
For frosted cake, cover and refrigerate for up to 5 days, depending on the frosting. Let slices sit at room temperature for 20 to 30 minutes before eating so the texture softens and the flavor wakes up. Cold cake tastes muted, like it’s still half asleep.
You can freeze slices or layers for up to 3 months. Wrap in plastic, then foil, then freeze. Thaw overnight in the fridge or a couple hours at room temp, and it’ll taste like you planned ahead, even if you didn’t.
Why This is Good for You
Let’s be real: cake isn’t a multivitamin. But this recipe does give you something useful: portionable joy that beats random snacking and sugar spirals. A planned slice can feel more satisfying than grazing on “healthy” stuff that never hits the craving.
It also includes protein from eggs and dairy, which helps balance the sweetness and keeps the texture plush. Using oil plus a bit of butter makes the cake stay moist longer, so you don’t feel tempted to over-frost just to cover dryness. IMO, a cake that stays good on day three is a small form of self-care.
Don’t Make These Errors
Most cake fails come from a few predictable moves. Avoid these and you’ll look like the person who always “just knows how to bake,” which is a fun reputation to have.
- Measuring flour by scooping. Spoon it into the cup and level, or weigh it if you can. Too much flour equals dry, dense sadness.
- Overmixing the batter. Mix until combined, then stop. A silky batter does not need a workout.
- Opening the oven early. Wait until at least 20 minutes for layers. Opening the door drops heat and can cause sinking.
- Skipping pan prep. Grease and line the pans. Cakes stick when you least need extra chaos.
- Frosting before fully cool. Warm cake melts frosting into a greasy slip-and-slide.
- Guessing bake time. Use visual cues and a toothpick test. Your oven does not care about someone else’s timing.
Different Ways to Make This
This base recipe acts like a blank canvas, but without the “I paid $80 for paint” energy. Change one or two things and you get a whole new cake.
- Chocolate version: Replace 1/2 cup flour with 1/2 cup unsweetened cocoa powder and add 2 tablespoons extra milk. Use hot coffee for deeper flavor.
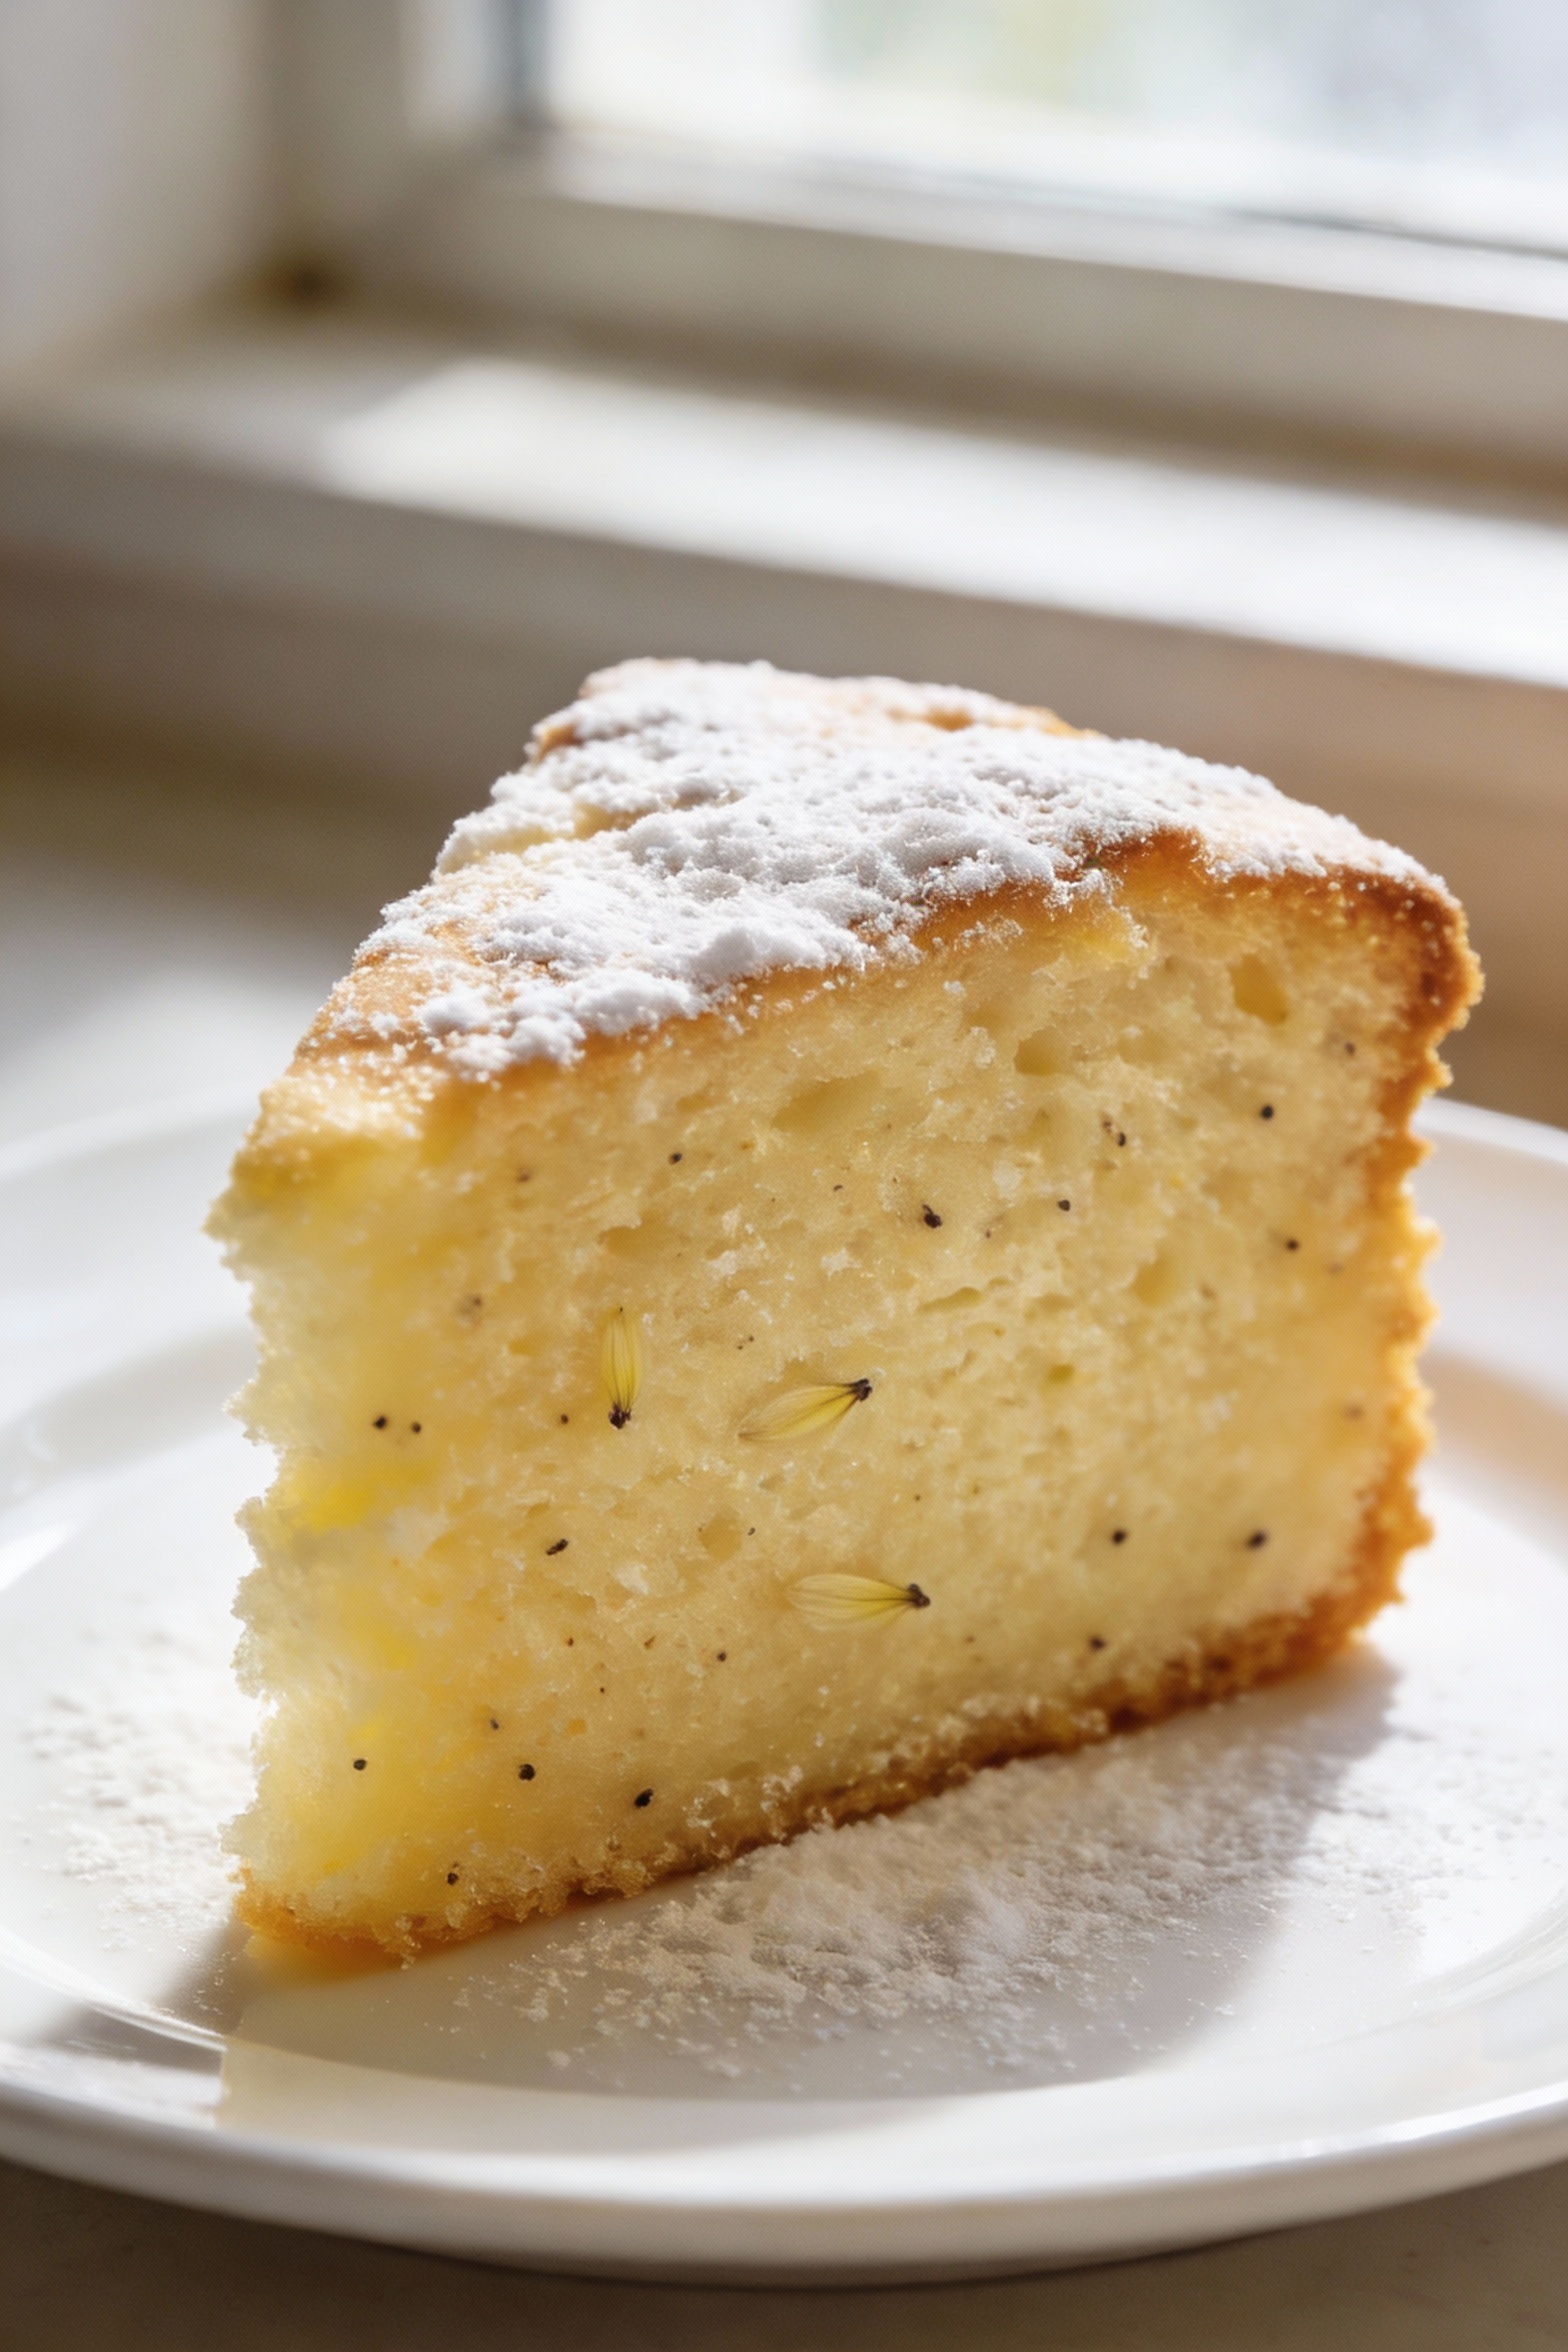
- Lemon version: Add 2 tablespoons lemon zest and replace hot water with warm lemon tea. Finish with a simple glaze instead of heavy frosting.
- Funfetti version: Fold in 1/2 to 3/4 cup sprinkles at the end. Use jimmies for best results, because nonpareils can bleed.
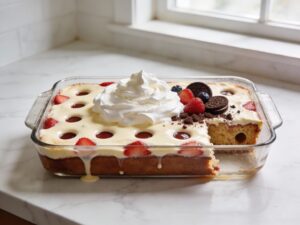
- Strawberry shortcake style: Bake as a sheet cake, top with whipped cream and macerated strawberries right before serving. FYI, whipped cream hates long fridge storage.
- Cupcakes: Fill liners about 2/3 full and bake 18 to 22 minutes. Same fluffy crumb, faster reward.
- Dairy-light option: Use unsweetened oat milk and dairy-free yogurt. Keep the oil, because it carries the moisture.
FAQ
Can I make this cake without a mixer?
Yes, and that’s the point. A whisk and a bowl handle it easily because the fat is mostly oil and melted butter, not cold butter that needs creaming. Just whisk until smooth and stop as soon as the batter comes together.
Why add sour cream or yogurt?
It adds acidity and fat, which improves tenderness and gives the cake a softer, richer crumb. It also helps the cake stay moist for days instead of turning into “bread pretending to be dessert.”
Can I use self-rising flour?
You can, but you’ll need to adjust because self-rising flour already contains leaveners and salt. For best results, stick with all-purpose flour and the listed baking powder, baking soda, and salt so the rise stays predictable.
How do I know when it’s done without overbaking?
Look for a gently domed top that springs back when tapped, and edges that pull slightly from the pan. A toothpick should come out with a few moist crumbs. If you wait for totally clean, you risk drying it out.
What frosting works best?
Vanilla buttercream keeps it classic, cream cheese frosting adds tang, and chocolate ganache makes it feel fancy with minimal effort. If you want the easiest route, dust with powdered sugar and call it “minimalist.”
Can I bake this in a bundt pan?
Yes, but grease it extremely well and flour it, because bundt pans love to cling. Bake longer, usually 40 to 55 minutes depending on your pan and oven. Cool at least 15 minutes before turning out.
Wrapping Up
This recipe gives you a reliable, fluffy cake with basic ingredients and simple steps. It’s the kind of bake you can pull off on a busy day and still get “wow” reactions. Keep your measurements tight, don’t overmix, and let it cool before you frost.
If you want to make it yours, swap flavors, add mix-ins, or turn it into cupcakes. The base stays sturdy, moist, and friendly to your schedule. Now go bake the cake and accept the compliments like you’re used to it.

